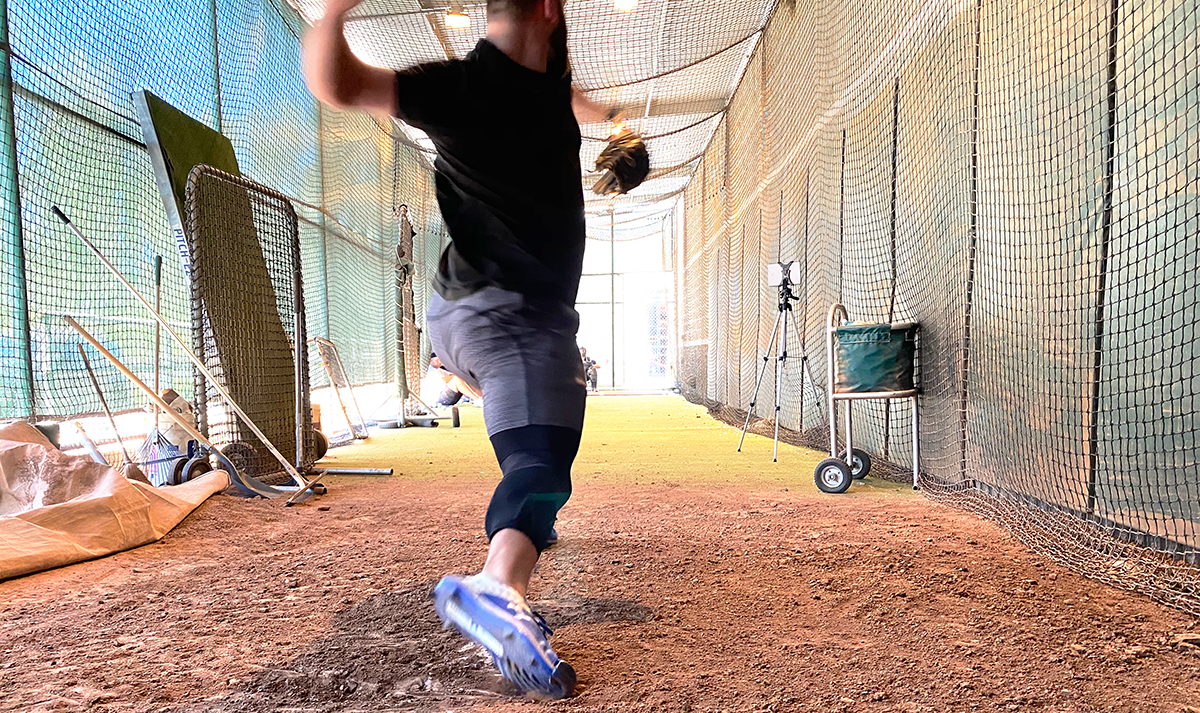
In sports such and baseball and softball, maintaining the health of your throwing arm is paramount to a long and successful season, and overall playing career. During the season, there are various measures and precautions in place in order to combat the stress that is put on the arm by repetitive throwing. These can include pitch counts, icing, designated rest days from throwing, running at practice to increase blood-flow and promote healing, and more. Furthermore, coaches will often implement various throwing drills and exercises to better strengthen their players’ arms and mechanics to allow for better and safer play. Now you might be thinking, this all sounds amazing, but how can we prepare physically before the throwing season even begins? We pitched that very question to Spooner physical therapist, Dillon Moeller, PT, DPT. Dillon is a former collegiate baseball player, current competitive softball player, and (hopeful) future contestant of The Titan Games. Dillon is also an active participant in the Spooner Sports Medicine Training program. Using his extensive knowledge and experience, Dillon throws some tips and tricks our way to help prepare athletes for the throwing season!
Before we begin
One of the most important factors in maintaining a healthy arm is proper rest. This doesn’t just mean between games and/or during the season, we’re talking about taking breaks from throwing altogether. Experts recommend having at least 2-3 months of rest from overhead throwing a year. In warmer climate states such as and Arizona and Florida, baseball and softball athletes are more susceptible to overuse injuries due to competitive year-round play. As Dillon states, “There’s Fall Ball, then Spring Ball, then Summer Ball; all the while, athletes are often competing in club ball, which is usually year-round, and non-stop. I grew up with a lot of pitchers that were great between the ages of 12-15, and then never heard of them again after that because they fell off due to burnout, and/or injury.”
As Dillon highlights, “Take all the collegiate and professional baseball players, most of them were multi-sport athletes in high-school. Why is this? Because by focusing on more than one sport, they allow their bodies to take a much-needed break from throwing, which prevents their shoulders from wearing down at an early age.” If you’re a young athlete, diversify the sports you’re involved in. This will not only help you gain and maintain a wide range of skills and athleticism; it prevents you from burning out physically and emotionally from the sports you love to play.
If your baseball or softball activities are starting up again soon, but you haven’t given yourself a proper break from your previous season, take the time now to rest from throwing. If you’re worried about falling behind and losing ground during this preparation phase before the season begins, have no fear. We’ve got plenty of exercises on deck that are sure to keep you busy and get your body into playing shape, without compromising the health of your throwing arm!
Learn about throwing mechanics in “Baseball Fundamentals: The Throwing Arm” on the Spooner Blog.
A strong foundation
Overhead throwing is an extremely complex movement. It starts from your foot and ankle generating force from the ground and transferring that force throughout the body until the ball is released from the tips of your fingers. Because of this, it’s important to ensure every part of the body is able to move and withstand the force required for proper throwing mechanics. As Dillon explains, “If there’s any weak links in the kinetic chain, your body will compensate in ways that usually result in more stress on your shoulders and elbows.” With that being said, lets lineup some exercises that will help you build this solid foundation now for throwing in the future. (Shoutout to our Spooner therapists and workout models Pete Gorman and Jenna Salber for providing us with the demos for each exercise!)

Lunge Matrix:
1. Lunge forward with your knee over your foot while reaching toward your knee with your hands. Return to starting position.
2. Lunge sideways, reaching toward your knee. Return to starting position.
3. Lunge diagonally out and backward, reaching toward your knee. Repeat on both sides.
PROGRESSION: Instead of lunging, try a hop with a controlled landing in each of the pictured directions.

Single Arm Row: Attach a resistance band in front of you at waist level. Stand with one leg out in front of you and one behind you in a split stance. Hold resistance band in hand of the side in which your leg is behind you.
Begin with the arm straight in front of you and pull the band towards you until your elbow is at 90 degrees and squeeze your shoulder blade back. Slowly return to the starting position.

3 Way RDL: Standing on one leg, begin exercise by slightly bending one knee and hinging your waist while reaching arms toward the floor straight in front. Return to center standing upright and repeat motion reaching toward right and then toward left.

D2 Flexion:
Secure band low. Standing in a staggered stance, grab the end of the exercise band and position so it is in front of your opposite hip.
Keeping your elbow straight, slowly bring your arm up and across your body, rotating your thumb up toward the ceiling. When fully lifted, slowly allow it to return back to the starting position, keeping your elbow straight. TIP: This should look like a throwing motion.

Squat with MB Chops: Stand with your feet shoulder width apart, hold the medicine ball with both hands. While squatting down, reach medicine ball to outside the knee. When returning to a standing position, move the ball in a diagonal pattern above the opposite shoulder. TIP: Keep eyes and chest up.

Plank with Hip Drivers: Start in a pushup position with arms extended. Alternate moving your hips through 3 patterns:
1. To the right and to the left.
2. Toward and away from the floor.
3. Rotating the right side of your pelvis toward the floor and then the left side.
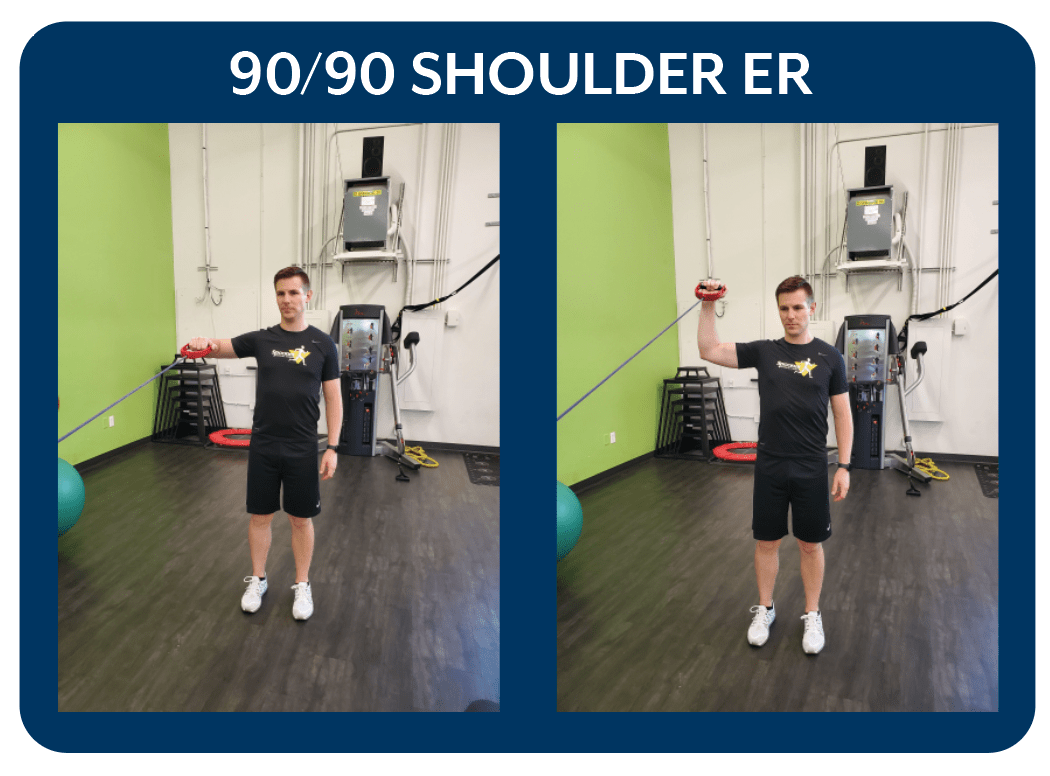
90/90 Shoulder ER: Begin standing with a band anchored in front of you at waist height. Bring your upper arm out to your side at 90 degrees with your elbows also bent to 90 degrees, arms parallel to the ground.
Slowly rotate your arms backward until your forearms are perpendicular to the ground. Then, allow your arms to rotate forward again against the resistance of the band. Be sure to keep your upper arms parallel with the floor as you rotate. TIP: Keep your neck in neutral and shoulder down.

3 Way Horizontal Abduction: Begin in a standing position holding a resistance band in both hands shoulder width apart. Raise your arms to chest height, palms facing downward, with slight tension in the band.
Move your hands apart with arms at shoulder height while squeezing shoulder blades together. Return to starting position. Move your hands apart diagonally as shown. Repeat in alternate diagonal.

Quadruped Transverse Plane Reaches: Begin on your hands and knees. Initiate exercise by lifting one arm and reaching underneath body to rotate the trunk. Follow this motion by driving arm out and up towards the ceiling with trunk rotating with the arm movement. Follow your arm motion with your eyes.

Kneeling Hip Flexor Stretch: Start in a half-kneeling position on padded surface.
1. Swing both hands up and overhead and return down while shifting hips forward, without arching low back.
2. Repeat with raised leg at 45 degree angle.
3. Repeat with raised leg at 90 degree angle.
In sports like baseball and softball, you can go from standing in place to moving at top-speed in the swing of a bat. Because of this, it is important to incorporate some explosive exercises to get your body prepared for those sudden changes in intensity:
Sprints
Start with short distances (20-30 feet), then slowly work your way up. No need to push past 90 feet at this stage in the game. For every 30 feet sprinted, give yourself 1 minute of rest time before sprinting again. This should provide enough time for your body to recover before setting off on the next set of sprints.
Box Jumps
Using a stable platform that allows for plenty of room for your feet to land, start with feet hip to shoulder width apart, bend your knees, then explode and jump up in the air, and land on the platform. Start with something that’s low height, then work your way up when comfortable.
We started from the bottom, now we’re here
You may have noticed that we have yet to recommend any sort of activity that involves throwing a baseball or softball. Good eye. This is no error, foul, or swing and miss on our part. We’ve intentionally pitched around the topic of throwing as an exercise recommendation for a couple reasons:
- Refer to the: “Before we begin” section of the blog
- Refer to Reason 1 (directly above)
As Dillon elaborates, “If you properly strengthen and mobilize your body from the ground up, when an athlete goes back to pick up a ball after a 2-3 month break from throwing, they’ll find that they not only haven’t missed a beat, they might be able to throw faster and more efficiently. I’ve seen kids that have taken an active rest from overhead activities for 3 months, and they can throw 3-5 mph faster when they return. As a medical professional, that’s a huge concept to get coaches, parents, and athletes to understand. You can make gains in your throwing ability without having to pick up a ball and put your shoulder and elbow at risk.”
Now you might be thinking, “What if I’ve had plenty of time off from throwing (over 3 months), I’ve been exercising on a regular basis, and just want to incorporate some light throwing into my routine before my season starts in a month or so?” Fair question. Dillon provides the following guidelines, provided you are properly rested, for getting back into throwing:
- Only throw 3 days a week.
- Take at least 1 rest day between throwing sessions.
- Start easy, 30ft to 45ft apart, throw for only 5 minutes.
- Provided you aren’t experiencing any pain or discomfort, gradually increase your distance and time.
- Throwing duration should not exceed 20 min.
- Throwing distance should not exceed 120ft.
Following these recommendations will help ensure your entire body is functional and in a good place before the season even begins.
Where PT comes in to play
As stated earlier, throwing is a complex movement requiring action from almost every part of the body. Physical therapists are movement specialists, and can help identify any mobility and strength deficits that are likely to cause problems down the line. Furthermore, our therapists create personalized treatment plans and programs catered to you or your athlete’s specific needs and goals. “Being able to get some one-on-one time with an athlete allows me to do a quick mobility and stability assessment, and come up with a varied and dynamic program that keeps them engaged and gets their body in the best situation for success,” Dillon explains.
In addition, if you or your athlete is experiencing any sort of pain or discomfort beyond the normal soreness felt after working out, please don’t hesitate to schedule an appointment with a Spooner physical therapist. Too often, athletes will try to push through pain or discomfort, when it could be an indication of a movement deficiency that can cause further problems if left untreated. So, don’t risk it!
Participating in throwing sports requires a durable and resilient athlete that is proficient in movement in all areas of the body. Spooner Physical Therapy is here to help however we can along your journey!
If you or your athletes have any questions or needs, schedule an appointment or complimentary movement screen with one of our therapists.
![]()
Check out our recent Podcast on Throwing Mechanics in PT Role In Throwing Mechanics.